 A system recovery disc or USB drive for Windows 7 can be an indispensable tool during those times when you experience a serious problem with your Windows 7 operating system. Windows 7 System Recovery offers multiple options including:
- Startup Repair – Automatically fix problems that are preventing Windows from starting
- System Restore – Restore Windows to an earlier point in time
- System Image Recovery – Recover your computer using a system image you created earlier
- Windows Memory Diagnostic – Check your computer for memory hardware errors
In order to access these options in the event of a serious error, however, you must create a System Recovery disc or USB drive in advance. Without this, your options become much more limited when a problem does occur.
Here is how you can create a Windows 7 system recovery disc or system recovery USB drive.
How to make a Windows 7 system recovery disc
With Windows 7 already running, follow these steps
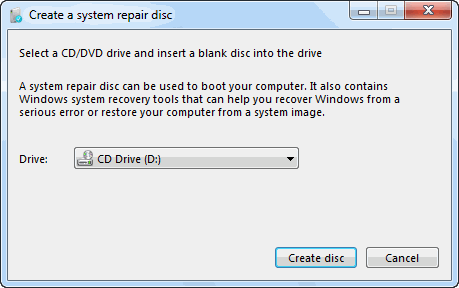
- Click Start > All Programs > Maintenance > Create a System Repair Disc

- Insert a blank CD or DVD into your disc drive.
- Click Create disc and let the program do its thing.
That’s all there is to it! This tool only needs to write about 140- to 160-megabytes to the disc, depending on whether your OS is 64-bit or 32-bit, and that should only take a minute!
How to make a recovery USB drive
If you do not have a CD/DVD-R drive to create a recovery disc with, you have the alternate option of downloading an ISO image file of the Windows 7 System Recovery Disc. This file can then be used to make a bootable USB flash drive. Here’s how!
- Download the appropriate Windows 7 Recovery Disc image from here (If you don’t already have a torrent client installed, such as µTorrent, you should do download and install one first… you’ll need it).
(Alternatively, if you have a DVD drive, you can use an existing Windows 7 Installation DVD or a Windows 7 Recovery Disc at step 7; Using a Windows 7 Installation DVD at step seven will also allow you to install Windows 7 via USB, not just recover a damaged system; very useful if you have a netbook!)
- Open a command prompt with administrative rights. To do this, click Start > All Programs > Accessories and then right click Command Prompt, followed by clicking Run as administrator.
- Accept any UAC verification questions, and you should be at the command prompt. Make sure your USB flash drive is plugged in and then type DiskPart, followed by pressing Enter.
- Type List Disk and then press Enter. Determine which disk number corresponds to your USB flash drive. In the following scenario, Disk 1 corresponds to our USB drive since we know our USB drive has a capacity of 2-gigabytes.
- Enter the following commands in order, changing the disk number to the disk number listed for your USB drive. (Warning – the following commands will erase everything on your USB drive or the disk you select.)Select Disk 1
Clean
Create Partition Primary
Select Partition 1
Active
Format FS=NTFS
- After DiskPart successfully formats the USB drive (which might take a few minutes), you will want to enter the following commands:Assign
Exit
- Now, you need to copy the contents of the ISO image you downloaded, or the contents of a DVD you wish use, to the USB flash drive. There should be two folders and a file in the ISO image that need to be copied. To extract the files contained within an ISO image, you will need to use a program such as WinRAR.
- Now, it’s time to make the USB drive bootable. To accomplish this you will need to download a small file called bootsect.exe; it can be downloaded from here or here (this file can also be found in the boot directory of the Windows 7 Installation DVD). Place the bootsect.exe file in the root directory of your USB flash drive.
- Back at the command prompt, you will want to change the current directory to that of the USB drive and run the bootsect command. In our case this is Drive E, so we will be using the following respective commands:E:
bootsect /nt60 E:
That’ all! The bootsect command will now update the target volume with a compatible bootcode. If done correctly, you should now have a bootable USB recovery drive!
FYI: Remember to add the USB drive to the boot list in your system’s BIOS for it to work upon start up.
