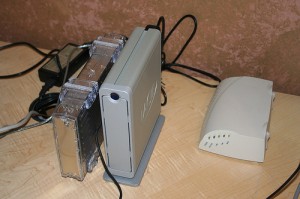
Manually backing up your Windows XP installation is a very easy to do just by following a few simple steps as a part of free computer maintenance. Backing up Windows XP allows the user to return to the default settings of the computer. Anything can be backed up on Windows XP by selecting it in the Windows XP Back-up utility.

image courtesy of flickr user: cogdog
To access Windows XP Backup utility:
- Click “Start”
- Mouse over “All Programs”
- Mouse over “Accessories”
- Mouse over “System Tools”
- Click “Backup”
- The Windows XP Back-Up wizard will start and show a new window.
- Click “Next” and select “Backup Files and Settings” and click “Next” again
- This will lead to the “Backup or Restore Wizard” It is here that you can choose what Windows XP will back-up.
Choices presented by the Windows XP Back-Up wizard are:
- My Documents and Settings – This option is recommended for computers with only one user on it. Choose this option and Windows XP will back-up emails, address books, personal Windows registry settings and data files.
- Everyone’s Documents and Settings – Choose this option to back-up all customized settings for all users on the computer. A computer with multiple users would benefit most from this type of back-up.
- All Information on this Computer – This type of back-up will save all files on the computer and can take a very long time to finish. Usually this means many gigabytes of information and the back-up wizard can take a very long time to finish the back-up.
- Let Me Choose What to Back-up – This option provides the most accurate back-up. Users are able to choose exactly what files and folders they would like to back-up. Select this option and the Windows XP back-up wizard will navigate to an “Items to Backup” page. Place checks next to all the items you want to be backed up.
Click “Next.”
After choosing what to back-up you must choose a destination for the Windows XP Back-Up Wizard to place the backed up files. It is recommended that backed up files be placed on some sort of separate storage space, such as an external hard drive or a USB drive. With that in mind click the “Browse” button in the wizard and navigate to the desired location for the back-up.
- Enter a name for the backed up file and click “Next”.
- Windows XP back-up wizard presents the option to schedule regular back-ups. Click “Advanced” to set this up. If not then select “Finish.”
- The wizard begins to back-up the selected files to the location set by the user.
Backing up important documents and pictures is a great idea for added security and free computer maintenance. In case anything should ever go wrong with the computer, the back-up will be able to restore anything that was lost as long as it was backed up. Computer maintenance is also important if back-ups are regularly scheduled. If a large amount of files are being backed up on a regular basis the time it takes to finish a back-up can be reduced if regular memory diagnostics and defrags are done. Manually backing up Windows XP as soon as the computer is turned on for the first time is a wise choice should you ever need to return to the installation default settings.
